Setup dizqueTV alongside HDHomeRun OTA in Plex
For what is essentially "Part 1", read Creating custom "TV channel" streams in Plex using dizqueTV.
If you use Plex and watch TV by watching any of the over-the-air (OTA) channels in your area, then I highly recommend picking up one of the HDHomeRun TV tuners. If you have a Plex Pass subscription, Plex can be setup to integrate with TV Tuner so you can watch your OTA TV using Plex and also schedule Plex to record OTA TV.
For this post, I will be going through the setup for integrating Plex with an HDHomeRun TV tuner in order to watch your over-the-air (OTA) channels, while also having the custom channels previously setup in dizqueTV. This setup requires a little bit of extra work because of the way Plex handles EPG (electronic program guide) and only lets you use EPG from a single source, so we will need to use another program called xTeVe in order to "merge" both our dizqueTV streams and EPG information with our HDHomeRun stream. Since HDHomeRun does not provide its own EPG information, we will get that information from either creating a free account at tvlistings.zap2it.com or tvguide.com.
Like the previous setup with dizqueTV, this will be done on Ubuntu 18.04.3 using docker containers.
The xTeVe project is located here: https://github.com/xteve-project/xTeVe
The container we will be using for the xTeVe setup is by dnsforge and is located here: https://hub.docker.com/r/dnsforge/xteve We are using this container because it contains Zap2XML support that will be used to scrap the EPG/guide/XMLTV data from tvguide.com or zap2it.com. This EPG data will be used for our HDHomeRun OTA TV guide.
Create directories for xTeVe container
Like with dizqueTV, I like to organize my docker container directories into a home folder, so we need to create the new home folder for the xTeVe container.
# Make xteve container home directory
sudo mkdir /home/docker/xteve
Like with our dizqueTV setup, we will be using the directory /home/docker/plex-share/ as a shared volume for xTeVe, and will contain a directory where our EPG XMLTV files will be stored. We'll need to create the 'shared' folder that xTeVe will use to store it's EPG XMLTV data that is scrapped.
# Make xteve container share directory
# This is where we will set the container to save the scrapped EPG/XMLTVdata to
sudo mkdir /home/docker/plex-share/xteve
Create xTeVe container
We will be using the dnsforge xTeVe container because it contains Zap2XML, which lets us scrap EPG/XMLTV data from zap2it.com or tvguide.com which is what we will use for the HDHomeRun OTA guide data later on in xTeVe. This container also supports Schedules Direct for EPG/XMLTV data, if you purchased a subscription for that.
# Create container
docker run -d \
  --name=xteve \
  --net=host \
  -e TZ="America/Denver" \
  -v /home/docker/xteve/:/root/.xteve:rw \
  -v /home/docker/xteve/_config:/config:rw \
  -v /tmp/xteve/:/tmp/xteve:rw \
  -v /home/docker/plex-share:/plex-share \
  -e PGID=1000 -e PUID=1000 \
  --restart unless-stopped \
  -p 34400:34400 \
  dnsforge/xteve:latest
You can now open xTeVe by going to it's url: http://MY_IP:34400/web/
Initial xTeVe setup
When you first launch xTeVe you will need to do some initial configuration. You can find more specific information for that here, but for now we'll use some pretty basic settings just for our specific setup with HDHomeRun.
Number of tuners
First you will need to select the number of tuners

This number determines the number of concurrent streams available from xTeVe. For our setup since my personal HDHomeRun tuner only has two tuners on it, I am selecting 2.
EPG Source
Next we have to select an EPG (electronic program guide) source, either PMS or XPEG.
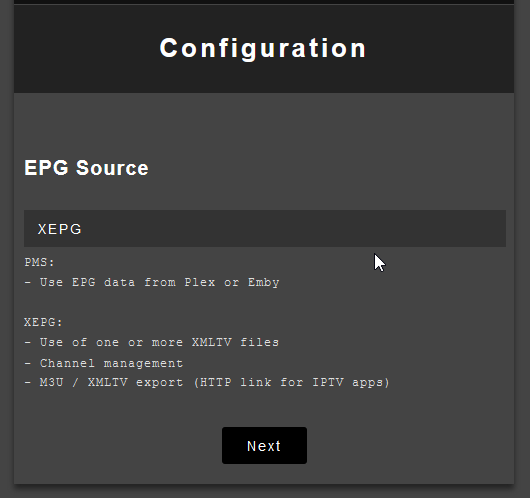
We're going to specify our own EPG data, so we're selecting 'XPEG' and click 'Next'.
M3U Playlist
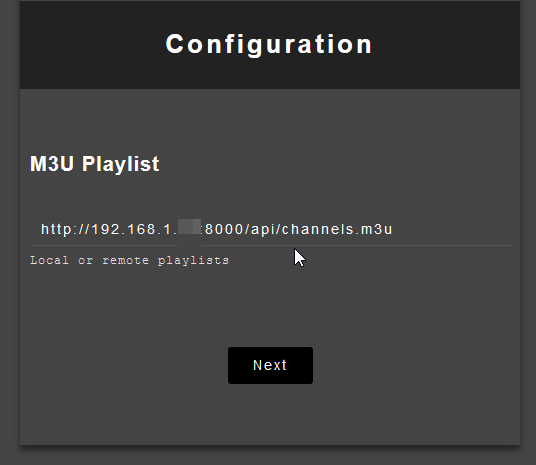
We have to specify an initial m3u playlist during the configuration, so we're going to use the m3u playlist provided by our dizqueTV instance.
Navigate to the dizqueTV instance and right click the 'M3U' link in the top right and copy the URL
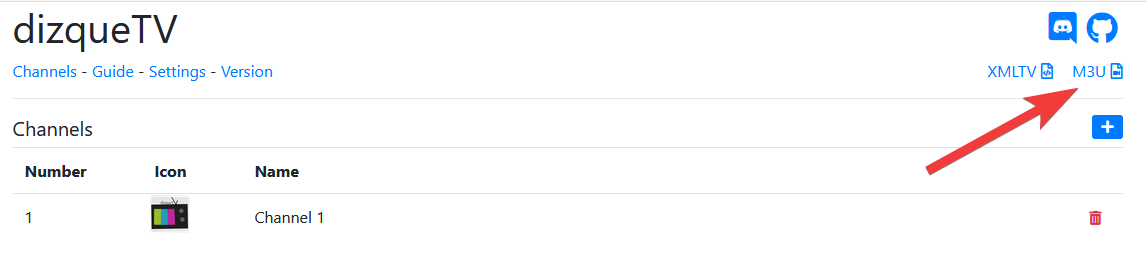
You'll want to paste that M3U url into the 'M3U Playlist' field in the xTeVe configuration window:
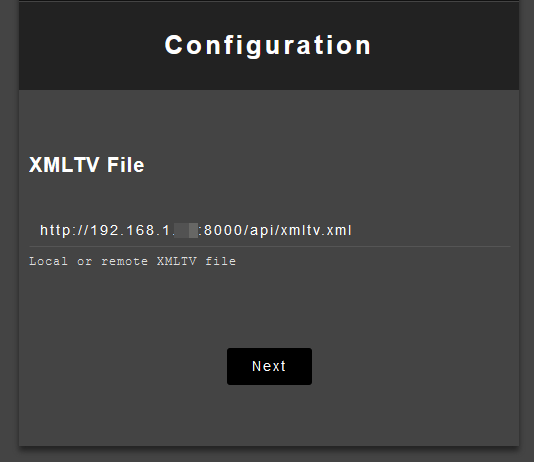
On the next screen, do the same thing for the dizqueTV's XMLTV link in the top right.
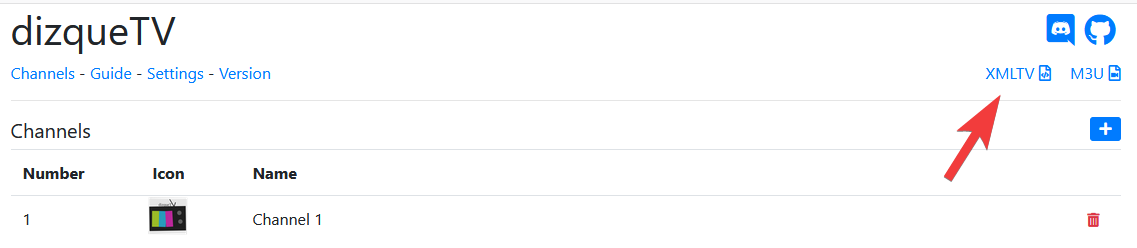
Copy the dizqueTV's XMLTV link to the xTeVe configuration:
xTeVe is now setup and the status information on the top of the xTeVe page should tell you how many streams are available, which should match up with the channels created in dizqueTV, and the XPEG Channels hsould match up with how many channels are also created in dizqueTV.

Rename Playlist and XMLTV
At this point, it is probably a good idea to go into Playlist and XMLTV and specify an understandable name for the dizqueTV playlist and XMLTV entry so they are not using the default names.


Verify Mapping for dizqueTV
We'll want to make sure our mapping for the dizqueTV channel is correct, click on the Mapping menu on the left.
The mapping screen is where you will configure each channel in xTeve from all sources. You can specify the channel number, channel name, icon and this is where you map the channel to the XMLTV file and channel within the XMLTV file.

Click a channel in order to change it's mapping information.
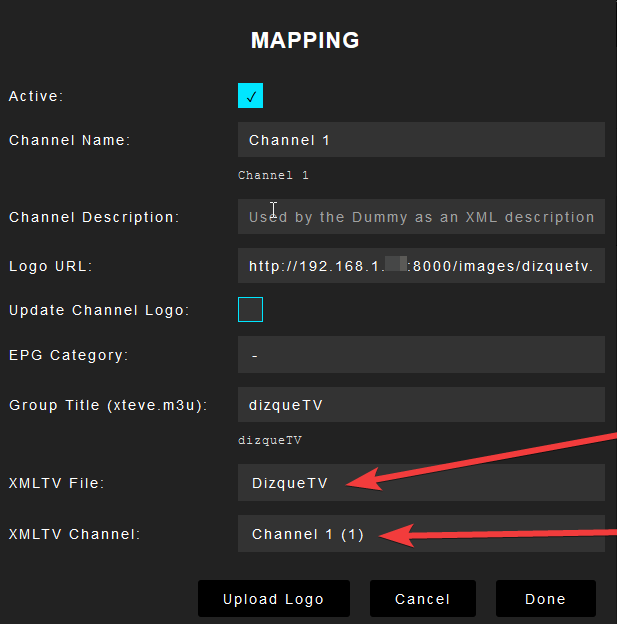
You will need to specify an XMLTV File and XMLTV Channel values in order for the channel to become "active" (green mapping entry). So for our dizqueTV channels, we need to select the DizqueTV entry in the XMLTV File drop down and then pick the correct dizqueTV channel from the XMLTV Channel drop down. The more channels we add, the larger these drop downs will become and the more time consuming it will be to do the channel mappings.
Note: You can check 'Update Channel Logo' and when you do the mapping it will automatically pull the channel's logo from dizqueTV.
That is it for adding dizqueTV channels to xTeVe! We'll now add our HDHomeRun OTA channels. The process is pretty similar.
Adding HDHomeRun OTA to xTeVe
Adding our HDHomeRun OTA tuner to xTeVe is pretty similar to adding the dizqueTV channels, but instead of using an m3u playlist we use the actual HDHomeRun tuner and we have to use either zap2it.com or tvguide.com for our EPG/XMLTV information by way of zap2xml and a cronjob.
Create TVGuide or Zap2it account
You will need to create a free tvguide.com or zap2it.com account and on that site, create your TV listing (E.g. just set your zip and choose your provider). For our HDHomeRun we're just using our local zipcode and selecting antenna.
Create Cronjob
We will be using a cronjob on the docker host that will execute zap2xml from inside our container every day at 1:15AM.
You will want to create the cronjob on whichever use has execute rights to the container.
Cronjob for tvguide
# Edit crontab
crontab -e

# Add the following to the crontab
# Replace [email protected] and _PASSWORD_ with tvguide.com information.
15 1 * * * docker exec -t xteve /home/xteve/bin/zap2xml.pl -z -u [email protected] -p _PASSWORD_ -U -c /home/xteve/cache/tvguide_ota -o /plex-share/xteve/OTA.xml
Cronjob for zapit2
  # Edit crontab
  crontab -e

  # Add the following to the crontab
  # Replace _USERNAME_ and _PASSWORD_ with zap2it.com information.
  15 1 * * * docker exec -t xteve /home/xteve/bin/zap2xml.pl -u _USERNAME_ -p _PASWORD_ -U -c /home/xteve/cache/zap2xml_ota -o /plex-share/xteve/OTA.xml
These cronjobs will save the generated XMLTV data to /plex-share/xteve/OTA.xml which can be read by xTeVe.
Manually run XMLTV generation
You will need to have an XMLTV file to setup our HDHomeRun OTA in xTeVe, so you should manually run this to create the file
docker exec -t xteve /home/xteve/bin/zap2xml.pl -u _USERNAME_ -p _PASWORD_ -U -c /home/xteve/cache/zap2xml_ota -o /plex-share/xteve/OTA.xmlAdd HDHomeRun Playlist to xTeVe
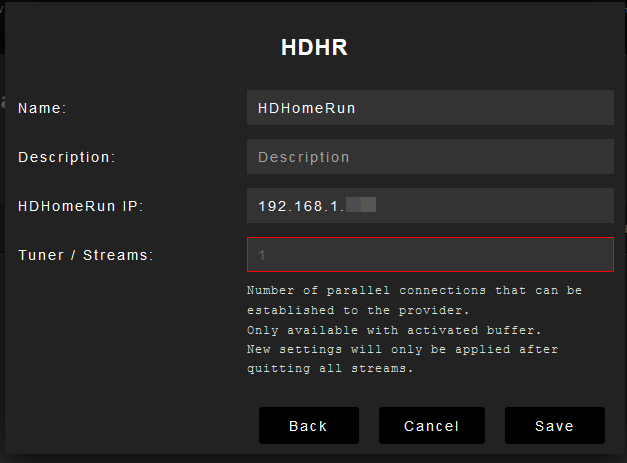
We'll need to add a new playlist to xTeVe in order for our HDHomeRun channels to show up, so go to Playlist and click 'New' and select 'HdHomeRun' from the 'type' list.
You should set the name of your Playlist to something useful and specify the IP Address of your HDHomeRun tuner:
Your playlist entries should now show all of your dizqueTV channels (streams) as well as the channels provided by HDHomeRun

Add HDHomeRun XMLTV to xTeVe
We'll need to add a new XMLTV entry to xTeVe in order for our HDHomeRun channel EPG information to show up, so go to XMLTV and click 'New'. Set the name to something useful and put the 'XMLTV File' value to '/plex-share/xteve/OTA.xml'.
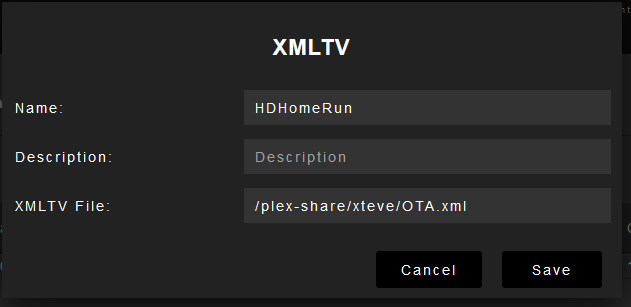
The XMLTV list should now show the channels from your dizqueTV channels list as well as the channels for your HDHomeRun and the program information scrapped from zap2it or tvguide:

Map HDHomeRun channels in xTeVe
You now have to do the timeconsuming and boring task of mapping each channel in xTeVe to the correct XMLTV file and channel within that XMLTV file.
When you first go to the Mapping page, you will see a lot of inactive channels from your HDHomeRun playlist, this is because we haven't mapped them to the correct XMLTV file yet.

You will need to click each channel in order to map it.
When mapping the channel, it is best to reference your HDHomeRun channel lineup so you can find the correct channel and channel number for each entry.
Using the HDHomeRun channel lineup as a reference, locate each channel by the 'Channel Name' shown in xTeVe, and get the channel number in HDHomeRun. In this example, KOBDT1 is channel 4.1 in HDHomeRun.

With this information, we set the XMLTV File to 'HDHomeRun', so we get the correct channel list, and then in the XMLTV Channel dropdown we find the correct channel, which in this example is 4.1.
You can set 'Update Channel Name' and 'Update Channel' logo in order to force both the name and logo to match what is scrapped from zap2it or tvguide.
It is also a good idea to manually change the 'Ch. No' field in the mapping grid to the correct channel number from the default channel number assigned by xTeVe.

You will need to do this for each channel provided by HDHomeRun.
Add xTeVe DVR to plex
Once you're done setting up xTeVe, you'll need to add a new DVR to Plex much like you did when setting up dizqueTV. My recommendation is to delete your current DVR and setup a new DVR.
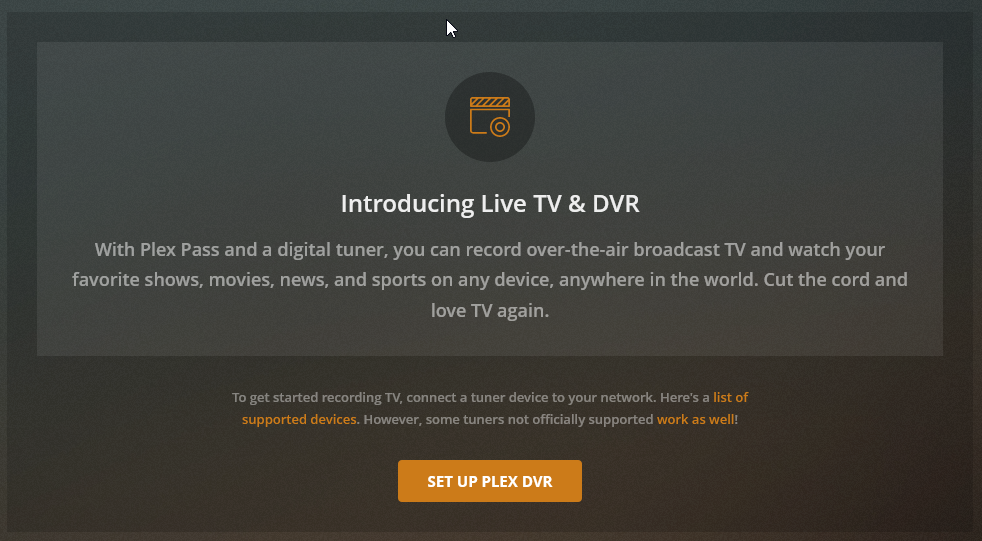
Setup a new DVR like normal by going into your Plex server's Settings and under 'Live TV & DVR' click 'Set Up Plex DVR':
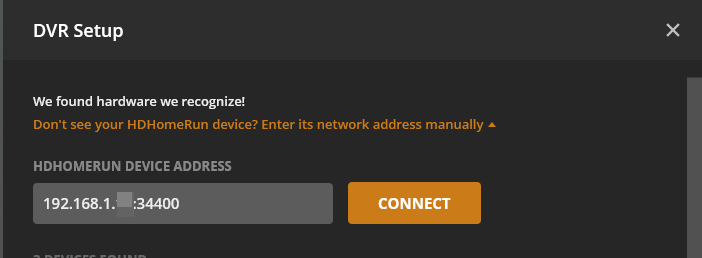
You may or may not see the new xTeVe DVR as devices on your network, so click 'Don't see your HDHomeRun device?' and enter the IP address of your xTeVe service as taken from the "DVR IP" field at the top of the xTeVe site:

and put it into the 'HDHomeRun Device Address' field and click 'Continue':
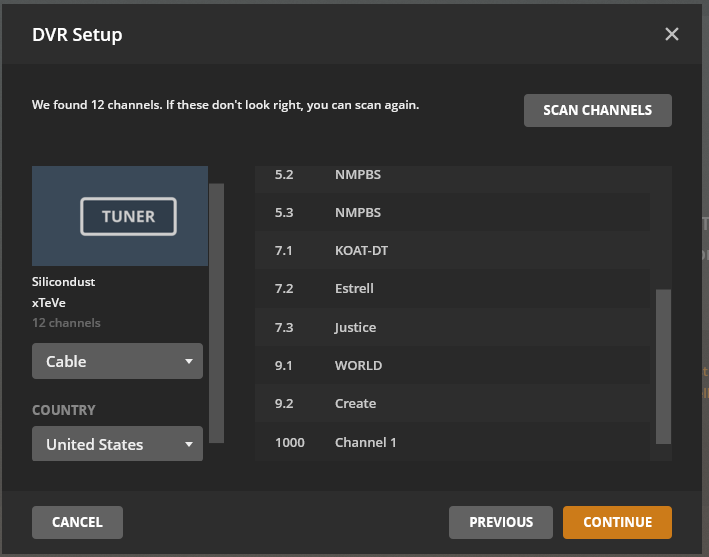
All of the channels that you setup in xTeVe should appear in the channel list:
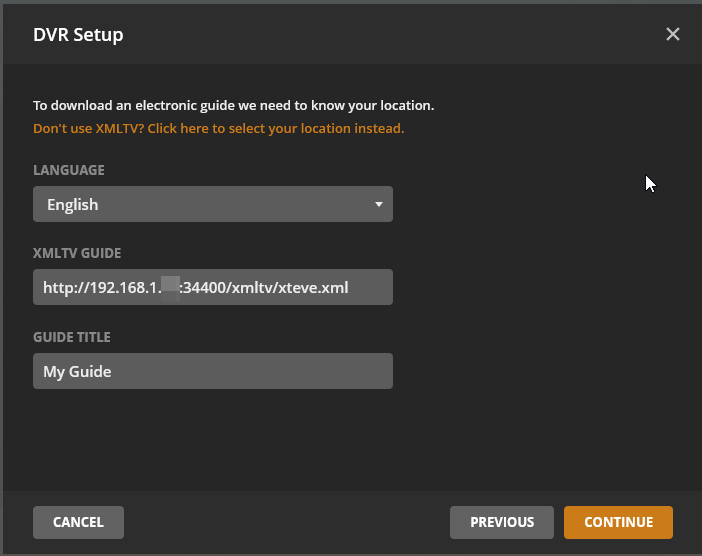
Click 'Next' and instead of setting up the electronic guide to fetch from your postal code, click 'Have an XMLTV guide on your server?' since we will be using the guide provided by xTeVe.
Back on the top of the xTeVe site, you will need to get the 'XPEG URL' value:

which is the url we will be entering into Plex for the 'XMLTV Guide' field:
Plex should automatically map the 'Device Channel' to the 'Guide Channel', but if it doesn't, you will need to manually map this by selecting the correct 'Guide Channel' in each drop down box for each channel in the list.
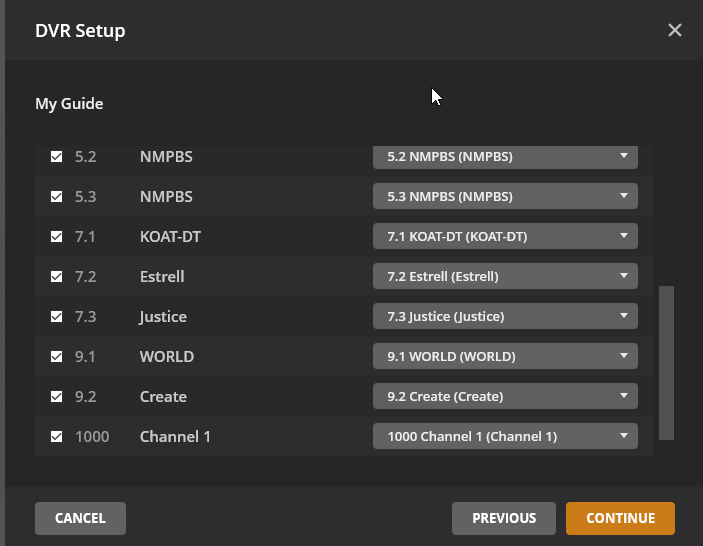
When you click 'Continue' Plex will start building the guide, and depending on how many channels you added, it could take awhile.
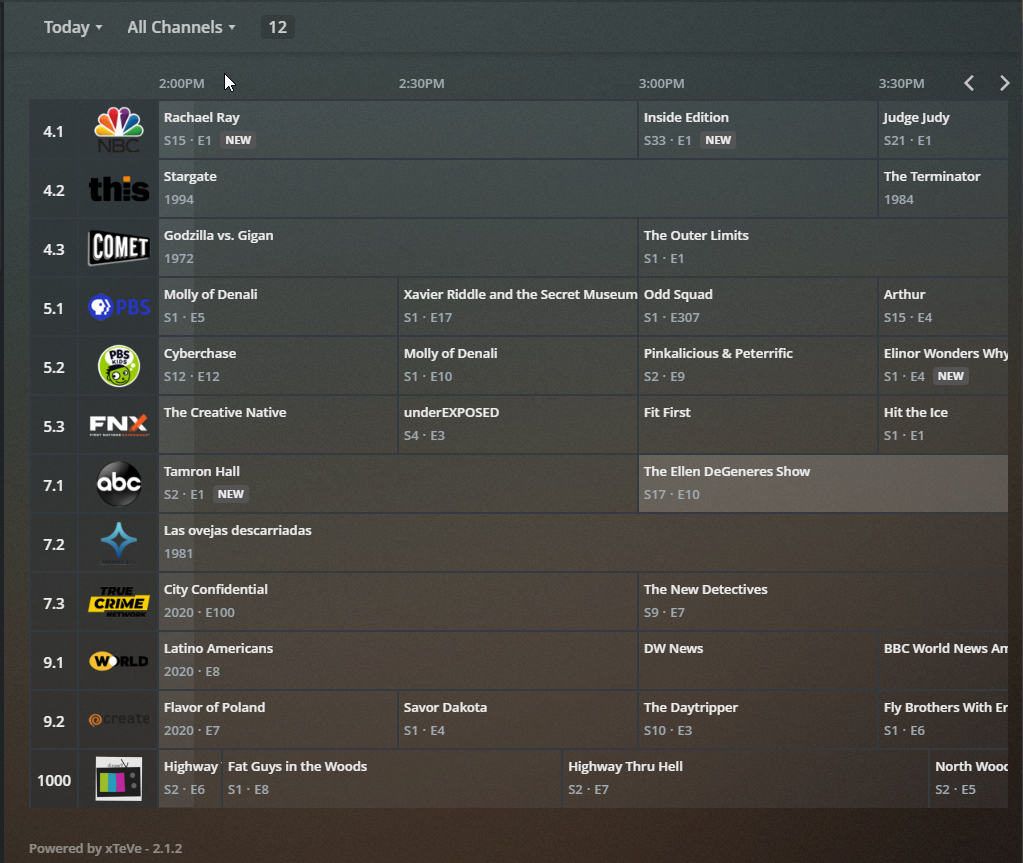
Once Plex is done building the guide, you should be able to navigate to the 'Live TV & DVR' library and view your new TV guide!
Updating xTeVe after making changes to dizqueTV
Any time you make a change to dizqueTV, you will need to go into xTeVe and update the dizqueTV's Playlist entry, XMLTV entry and Mapping.
I generally recommend that you delete and resetup the TV DVR in Plex since it tends to be flaky when you try to add new channels through xTeVe.
Update Playlist
Click Playlist and click your dizqueTV M3U playlist to open it. Click 'Update' in order for xTeVe to see added/removed channels.
Update XMLTV
Click XMLTV and click on your dizqueTV XMLTV entry to open it. Click 'Update' to force an update of the EPG information.
Update Mapping
Click Mapping and setup the mapping information for any new channels that have been added into dizqueTV.